Tuesday, February 26, 2013

Plastic Bottle Garden

How cool is this plastic bottle garden. Seems like a great way to recycle! But be careful before undergoing a project like this. It might be harmful to your health.
plastic-bottle-garden

I could not find the original source for this image, so there is no more information about this cool looking garden or what type of bottles they used, but we were getting few questions on facebook about chemicals from the plastic, leaching into the soil. This is a real concern. About.com mentions that Bisphenol A (BPA) in water bottles can cause interference of hormonal messaging, cancer and other nasty stuff.

There are numerous types of plastic made of different materials. All sources Ive researched say that #2 (high density polyethylene), #4 (low density polyethylene), and #5 (polypropylene) are safe for food. Are they safe enough for a plastic bottle garden? Im still looking, but I would seriously think twice before you building a garden like this. Check the type of plastic the bottle is made of, research the chemical components and if it has the likelihood to leach into your soil.


Plastic Bottle Garden

Sunday, February 24, 2013

How to Make a Terrarium

Been researching how to make a terrarium. Its  a fun, simple little project that can be around for years and it doesnt take long to make.

Terrariums are self sustaining environments that need only sunlight to survive. The plants emit water that gathers as condensation on the glass. As the water gains mass, it drips down the side of the glass, into the soil for the plant to use. An image shared with us on facebook showed a beautiful terrarium that had only been watered once – in 40 years!

how to make a terrarium

Terrariums are built in layers for drainage (rocks, floral moss, dirt).  Carbon from charcoal helps purify the terrarium environment, reducing mold and fungus and keeping it from becoming smelly.

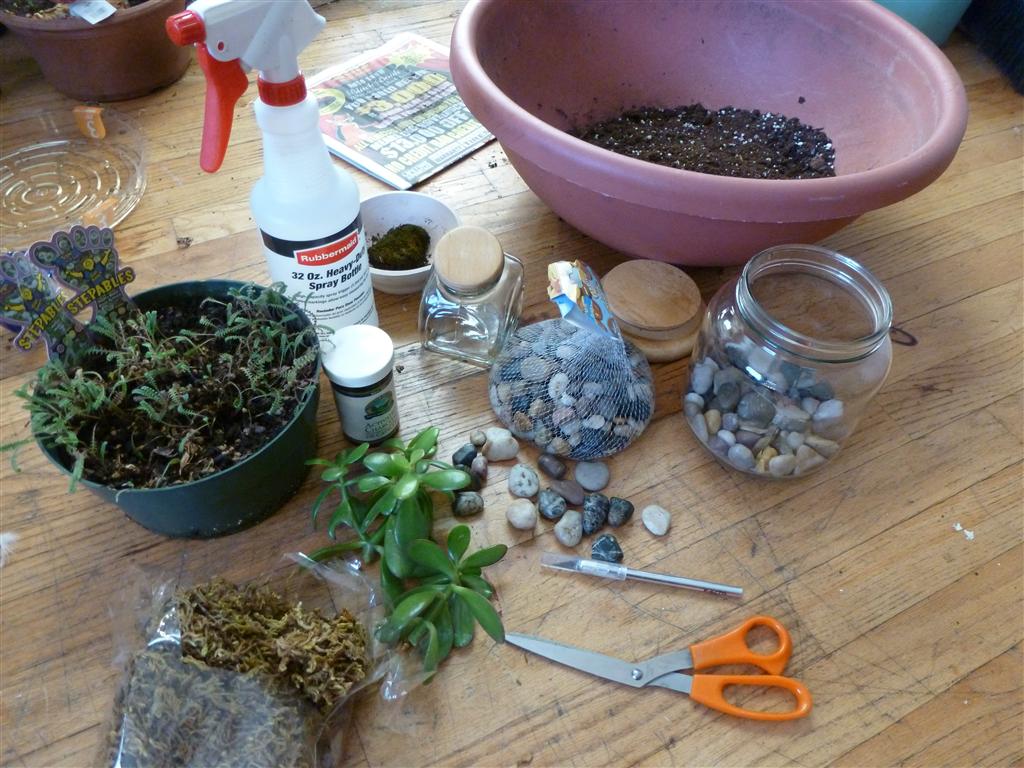
Gather your supplies. I have a jar from the resale shop (99cents) a bag of rocks and floral moss from the dollar store. Soil. and Terrarium plants. Here, I took some cuttings from our Jade. There are no roots yet, but if all goes well, they’ll root quickly. I also have a little steppables ‘Brass Buttons’ fern.


How To Make a Terrarium

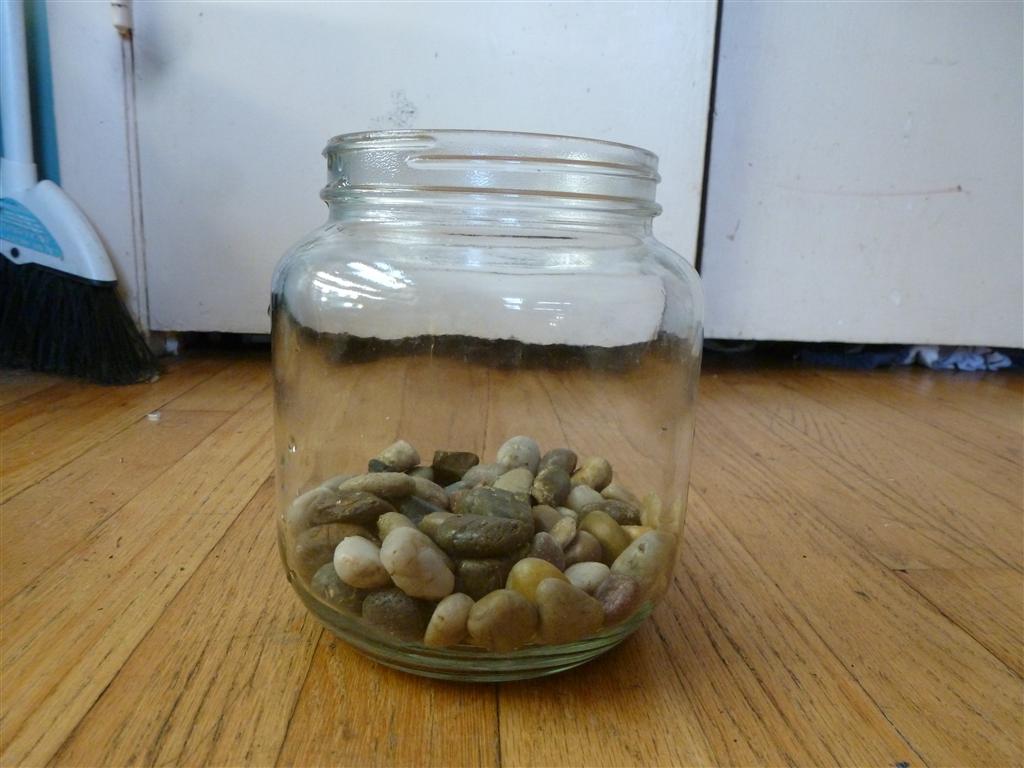
Lets start layering. I started with the dollar store rocks…
how to make a terrarium - rocks


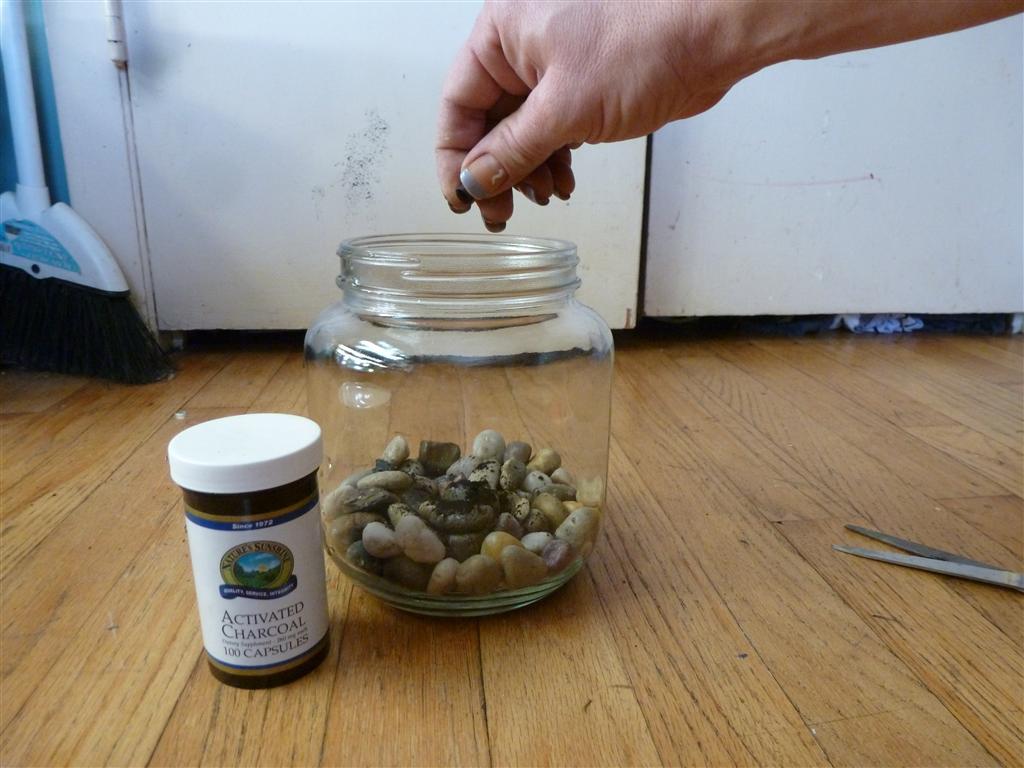
I didnt have terrarium charcoal. I read that it consists of activated charcoal, and I DID have that in capsules, so I cut a few open and sprinkled it in. We’ll find out if it works.
how to make a terrarium


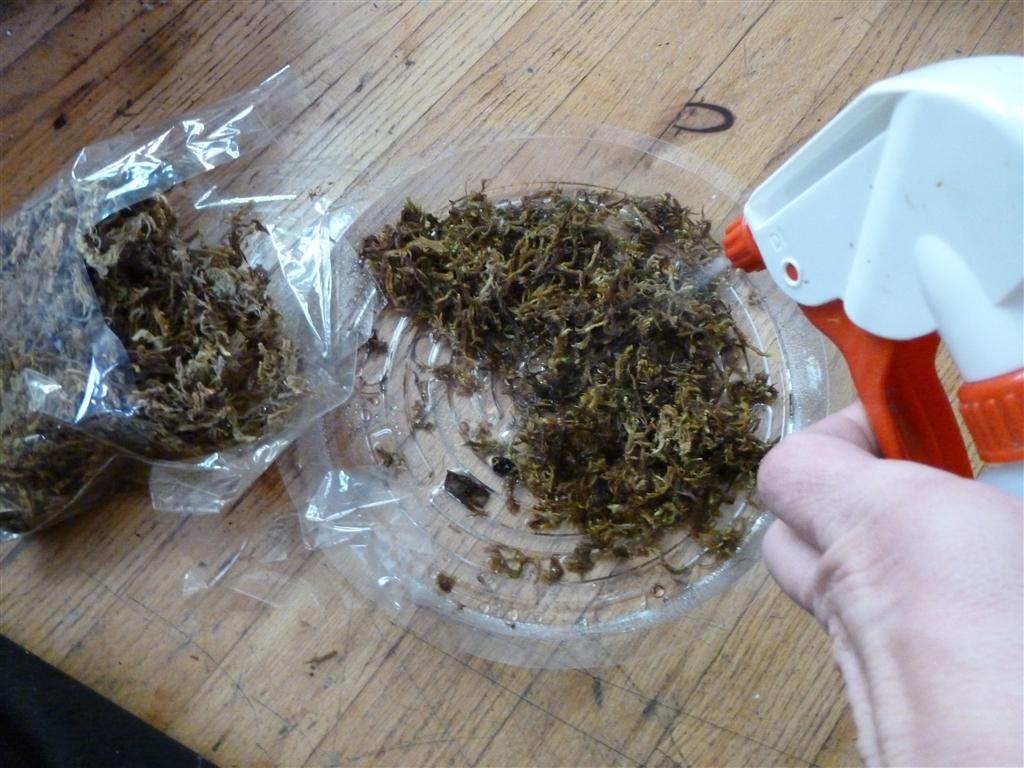
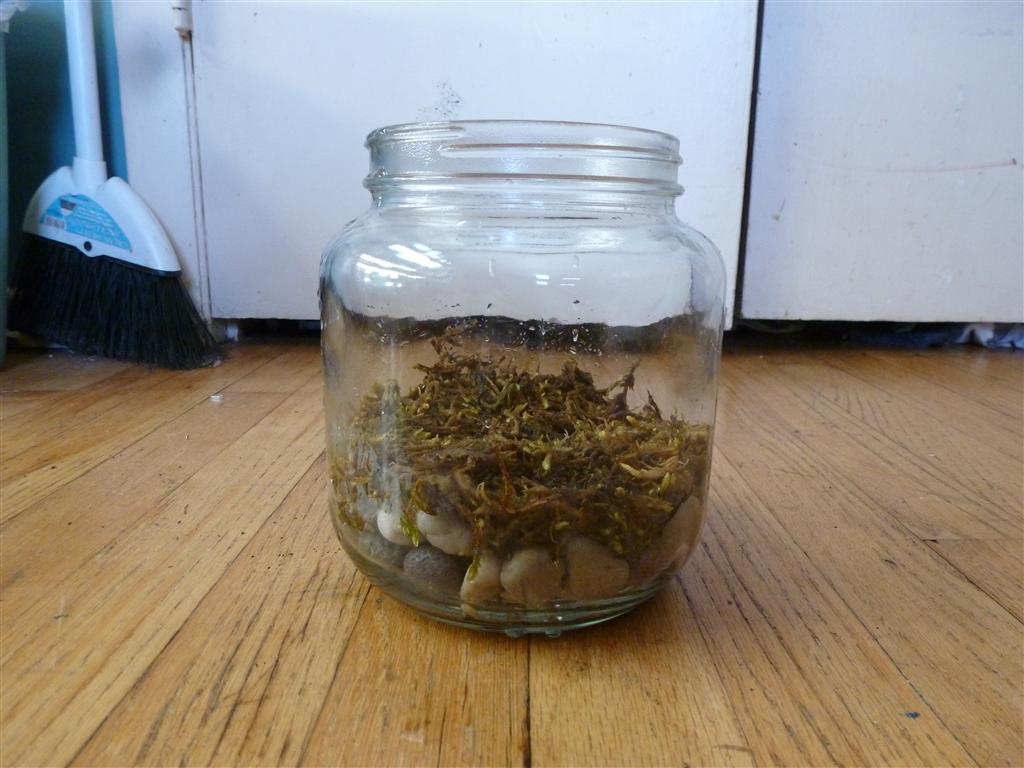
Next, I thought a layer of moss would look nice, and floral moss did the trick. I learned that its easier to construct your terrarium if everything was good and wet, so nothing falls through the cracks
how to make a terrarium - moss

 
Looking pretty cool, and I noticed a little fog around the rocks. Its already beginning condensation.
how to make a terrarium - layers

 
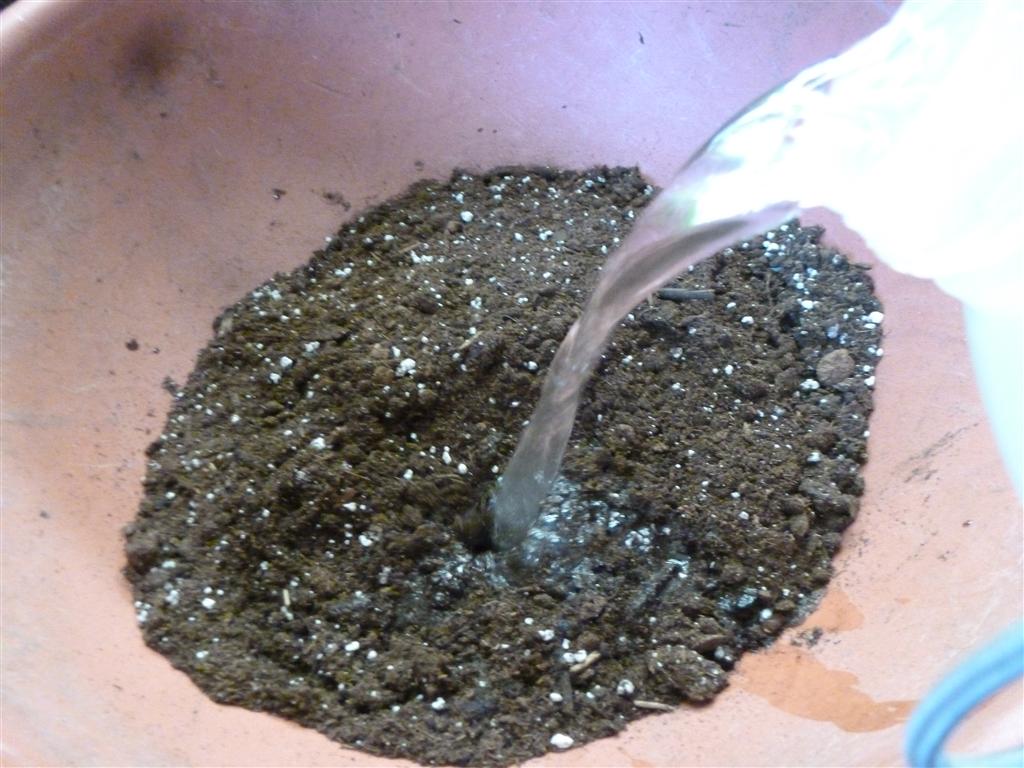
Wet the soil so its easier to add this last layer before the plants go in.
how to make a terrarium - soil

 
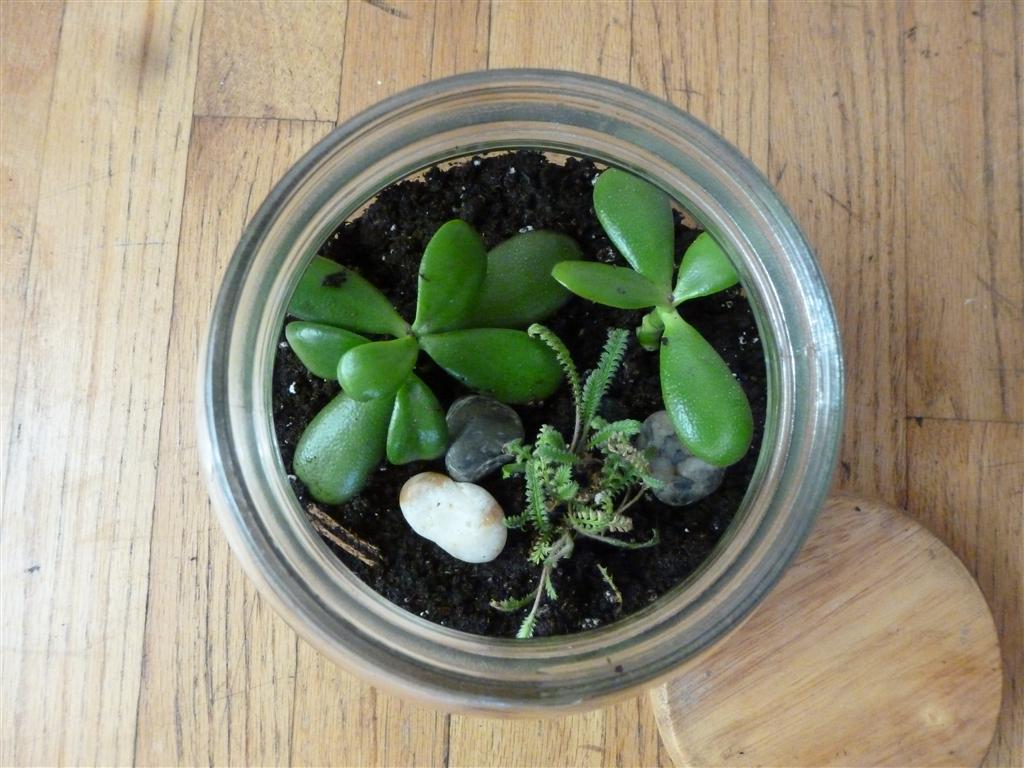
Two jade cuttings, a little clump of brass buttons (Leptinella squalida New Zealand Brass Buttons) and some more rocks for visual appeal. awesome.
how to make a terrarium - plants

 
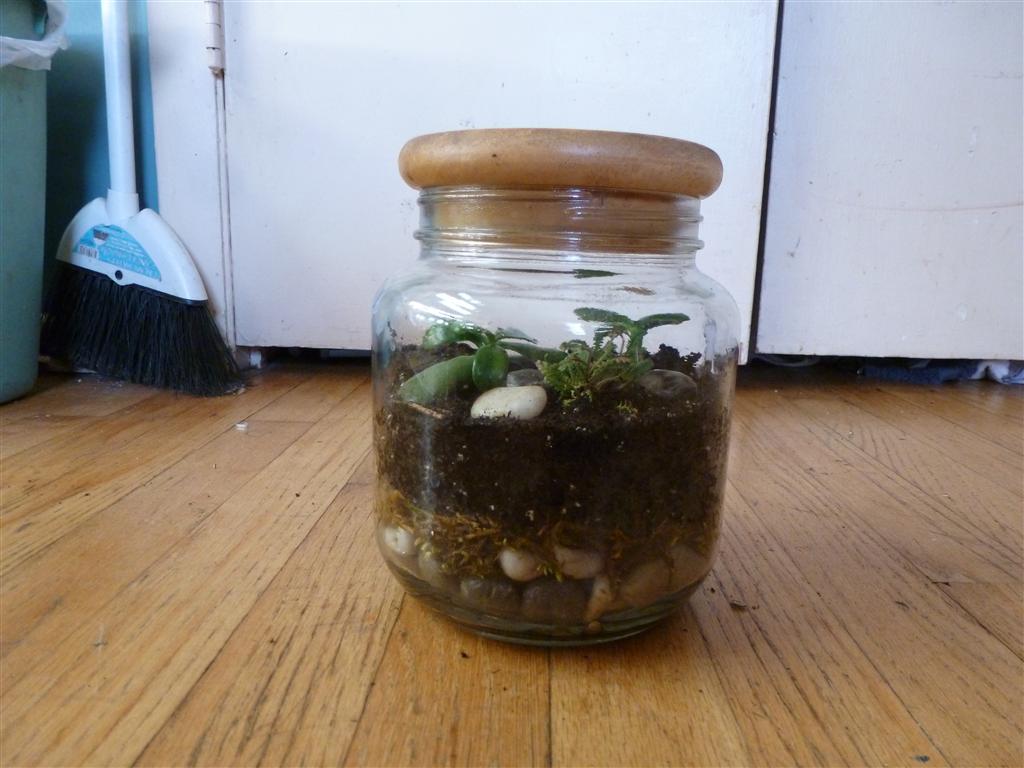
Heres the finished product, looking totally cool. Now to watch it grow.
how to make a terrarium - plants

So where do I put my terrarium after its finished? How much sun does this thing need? Of course depends on your plants, but its good to keep it out of direct sunlight. If you have a closed terrarium, it could bake your plants – it gets hot in there! If the plants are brown and wilting, its probably not getting enough light. If the plants are growing tall and leggy, its ‘reaching’ because it wants more light.


How to Make a Terrarium

Saturday, February 23, 2013

My First Fairy Garden Doors

I was so impressed with how great popsicle stick fairy doors look, I had to try it myself. What I didn’t know is that they’re quick easy projects you can do with your kids. Very satisfying without a ton of effort.

Fairy Garden Tools

fairydoor-toolsI gathered stuff from around the house… found the old popsicle sticks, raided the sewing tins and junk drawers for buttons, thumbtacks, jewelry. After my first two, a ‘fairy door shoebox’ filled with tools and goodies, was a necessity. I started with Gorilla Wood glue, with hopes that they will hold up to water outdoors and in fairy garden containers. Its rated indoor/outdoor use with Type2 water resistance, but what I like about this glue is that it sets quickly and theres no foam like with regular gorilla glue.

Fairy Garden Door Construction

Its a rather straightforward process. Lay popsicle sticks out to create the design you want. Cut two cross pieces to hold it all together and glue. Pick out cool buttons, charms from old jewelry, moss and glue it on. I used wood stain on some, paint on others and left on bare. Here are the first two.
2 doors

Add some color! I have a thing for red doors. After posting this picture on facebook, I found out so much more about red doors. “Feng shui says that they are good luck.” “In China, it’s tradition to paint the front door red before the new year, to invite good luck and happiness.” “In Catholocism, the red door on a chapel symbolized the blood of christ, and other martyrs, to signify that the ground beyond the door (inside the church) was holy, and a sanctuary from physical and spiritual evils.” “In Ireland, front doors are painted red to ward-off ghosts and evil spirits.” And last but not least, It is just a “pop” of color for a house. I had no idea!
red door

So I kept going, loving every minute of it. Honestly, they go so quick you can do a half dozen of them in no time.

At this point, I had a question. How do you get these things to stand up. Most fairy doors Id seen online were attached to a tree, but I wanted to put them in containers. So I did some searching and I found the most impressive fairy door Ive ever seen. Its elaborate and breathtaking with a ton of detail.
inspiration

I was inspired to say the least! Since we were just working with the hole boring drill bit to build our hoop house cold frame (and i didnt have to go outside in 20 degree weather to get them) It made the most sense to attach the doors to branches, then drill holes the size of the branches in a base. This is what I came up with. I poured a little glue into the holes to get them to stay.
finished fairy doors
3 finished-fairy-doors


My First Fairy Garden Doors

Saturday, February 16, 2013

How to Build A Cold Frame

Cold frames are great for all sorts of garden related things… Storing plants you didn’t get a chance plant the previous year. Extending your growing season for cold weather veggies, and hardening off seedlings you started indoors.

Good thing cold frames are so easy to build. Sure you could buy a cold frame kit, but theres not much to building one yourself. Any scrap wood, any old garbage picked window and you’re good to go. Some key things to think through during your cold frame construction.

Location.
If you have a south facing location to put your cold frame, preferably close to the house, this will provide the most heat. Size and shape? Thats totally up to you and your location.

Solar Angle
As far as the angle to set the window, the general rule of thumb for winter is your latitute plus 15 degrees for the optimal solar angle.

Air Flow
When its COLD, you want your cold frame to be air tight. That means filling any gaps between the wood or windows. ALSO, it gets super hot in a cold frame when the sun is blazing down on it, even when its not hot outside. It smart to attach your windows with hinges and devise some sort of prop to hold the windows open slightly for ventilation. It’s also smart to invest in a cheap thermometer to monitor your temps.

Here is our south facing cold frame.
how-to-build-a-coldframe
Size and shape were 100% determined by the location, the wood and the salvaged windows we had laying around. It could use some soap and water, but overall it blends nicely. The window is not set at an optimal angle, because it wouldnt be tall enough in the front to actually fit plants in, but Im sure it will suffice… temperature reading in mid February was 50 degrees, on a 30 degree day.

Another smaller (prettier) cold frame at a better solar angle. Wood salvaged from freecycle.org
cold-frame

Dont have windows? Plastic works just as well. You could staple or clamp 4 mil plastic right onto your wooden box. Just make sure its easy to open and close so you can check on your plants AND that it stays relatively air tight when you close it back up. We’ve even built a wooden frame to staple plastic on, and then clamp onto the cold frame.

Cold frames are easy, just about anything that will retain humidity and keep out damaging, drying winds will do. Even something like this milk jug clotche.
milkjug-clotche


How to Build A Cold Frame

Monday, February 11, 2013

Indoor Vegetable Garden from Scraps

Dont Make Soup, grow vegetables!

Grow an Indoor Vegetable Garden from Leftover Scraps.

I’ve been seeing a lot of people growing celery from the bottom 2″ of the stalk, and was inspired to try it. But I wondered what other vegetables can you root from the original plant. Here’s a quick list of what I’ve found from all around the net.

  1. Celery
  2. Onions – Green and Round
  3. Potatoes – Regular and Sweet
  4. Leeks, Scallions
  5. Carrot Tops
  6. Pineapple
  7. Romaine Lettuce
  8. Cabbage
  9. Avocado
  10. Sprouts – beans, sunflowers, lentils, pumpkin, alfalfa
  11. Ginger
  12. Garlic
  13. Bok Choy
  14. Beets
  15. Turnips
  16. Rutabaga
  17. Lemongrass

Ive personally tried pineapple, but it always seems to rot the minute I stick it in dirt. Heres a video of it actually working, plus quite a few other veggies rooting.

And last but not least… if youre REALLY into this, theres an entire book dedicated to the subject
dont-throw-it-grow-it-book
Don’t Throw It, Grow It!: 68 windowsill plants from kitchen scraps by Deborah Peterson


Indoor Vegetable Garden from Scraps

Friday, February 8, 2013

Winter Garden: The Winter Harvest Handbook

As I was discovering more about the Winter Garden, Jon bought me this awesome book that explains how a zone 5 Maine commercial farm performs the winter harvest to supply local restaurants with fresh vegetables. Its nothing short of amazing if you live in a cold climate, to know you can have fresh veggies in the winter.

The secret is double protection and timing. With their ‘cold house technique’ they sow seeds straight into the ground outdoors, with one large quonset hoop above and row covers below (wire ‘wickets in the shape of a rectangle holding row covers) Then when the weather warms, they move the whole ‘house’ to cover warmer vegetables.

To get this winter harvest, they start the cold vegetables in August and September, providing the heat necessary for seeds to germinate. As the weather grows colder, they protect the plants from frost with their ‘cold houses’

From The Winter Harvest Handbook by Eliot Coleman

Page 6. (this image from the kindle edition)

Page 6. (this image from the kindle edition)

Great customer image on Amazon

Great customer image on Amazon


Winter Garden: The Winter Harvest Handbook
plant nursery hey guys...

I Started a Plant Nursery!

RootsNursery. Where every 1 gallon plant is only $5
Sign up on our Mailing List