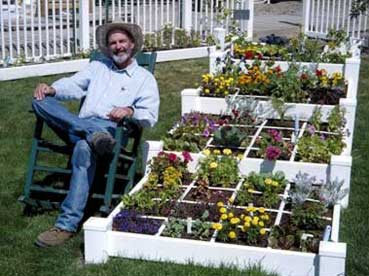
 Mel Bartholomew, inventor of square foot gardening was not a horticulturist by trade, he was a civil engineer who sold his company and retired to his garden at the age of 42.
When Mel started gardening, conventional gardens were single row gardens, averaging a 20′x30′ ft. His very first disappointment was that tending this type of garden was really hard work. You tilled and dug and ammended and weeded… and weeded, then weeded some more. It was just plain hard. So much work! all summer long.
Gardeners know, by July, your energy is spent and guess what, your garden is full of weeds. And who would blame you, its too stinkin hot to be out there doing the worst gardening task to ever exist, weeding.
But Mel went along with it, after all, he wanted to garden and he was up for the challenge. So he learned, and worked hard, but his acute engineer mind griped as each new ‘conventional method’ posed another question… and he had to know why…
Why do we garden in single rows?
Why do we need 3 foot aisles between the rows?
Why do we till to loosen the soil, then walk all over it to pack it back down again?
Why is the garden located in back, as far from the house as possible?
Why do we fill each 20 foot row with one single plant? And who can eat that much of one thing?
Why do we plant all these seeds just to go back and thin them all out? Why cant we just plant the seeds we want?
None of it made sense and Mel wanted answers. So he traveled the country asking experts “Why do we Do it this way??” The most common answer came back as ‘Thats the way its always been done’ For an engineer/efficiency expert, this was just not good enough.
So many brilliant discoveries stem from questioning the norm. This was no different. Mel proposed the following…
What if we create a space that we dont walk on and compact the soil? A space that everyone can reach into to tend. Instead of one long row, couldnt we have multiple rows combined in a smaller space? What if we stop using fertilizer? What if we eliminate digging entirely and did away with expensive gardening tools and most importantly, all that hard work?
So he started experimenting with ways to make his garden better. In the end, he invented a new way to garden… one year later, he came up with ‘Square foot Gardening’.
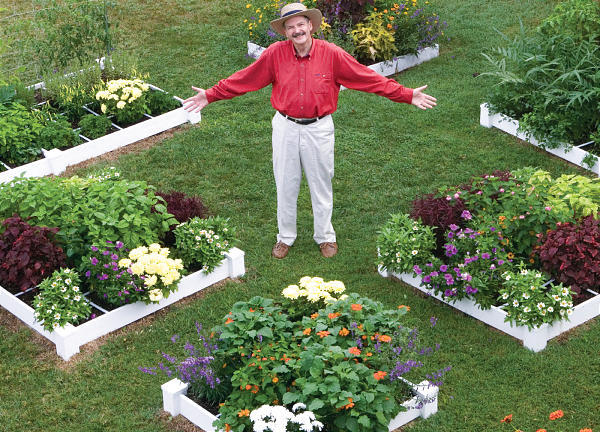
He created a smaller garden space that was within everyones reach – 2 feet. And the first square foot garden was built. A raised 4′x4′ bed, where you can reach the middle from every angle. This reduced garden size. It reduced waste by sowing only the seeds you need. And at 6″ tall, it reduced the amount of soil.
Square Foot Gardening Raised Bed
Its an open bottom box frame (4′x4′x6″deep – OR 3′x3′ for children) made of lumber, cedar or just about any type of material you can find, even cinder blocks. Weedwack the grass, lay down landscape fabric (or newspaper, or even nothing at all) and fill the box with soil.
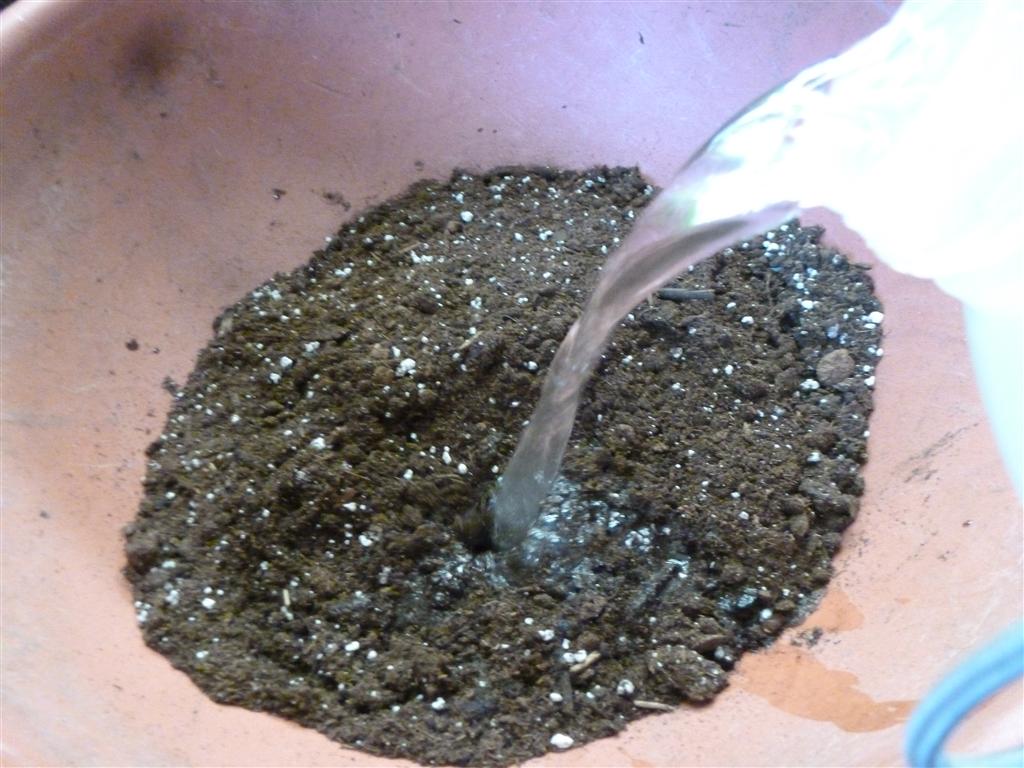
What kind of soil you ask? He calls it “Mels Mix”.
Square Foot Gardening Soil
Its equal parts compost, peat moss and vermiculite. This soil mix provides all the nutrients you will ever need to grow a beautiful, bountiful harvest. He claims it never needs to be replaced, fertilized or ammended. You’ll only need to replenish with more soil when it runs low. He is very specific about his compost being a combination of at least 4 different types of composted material. Every bag of compost has the ingredients labeled, so read before you buy.
Square Foot Gardening Spacing
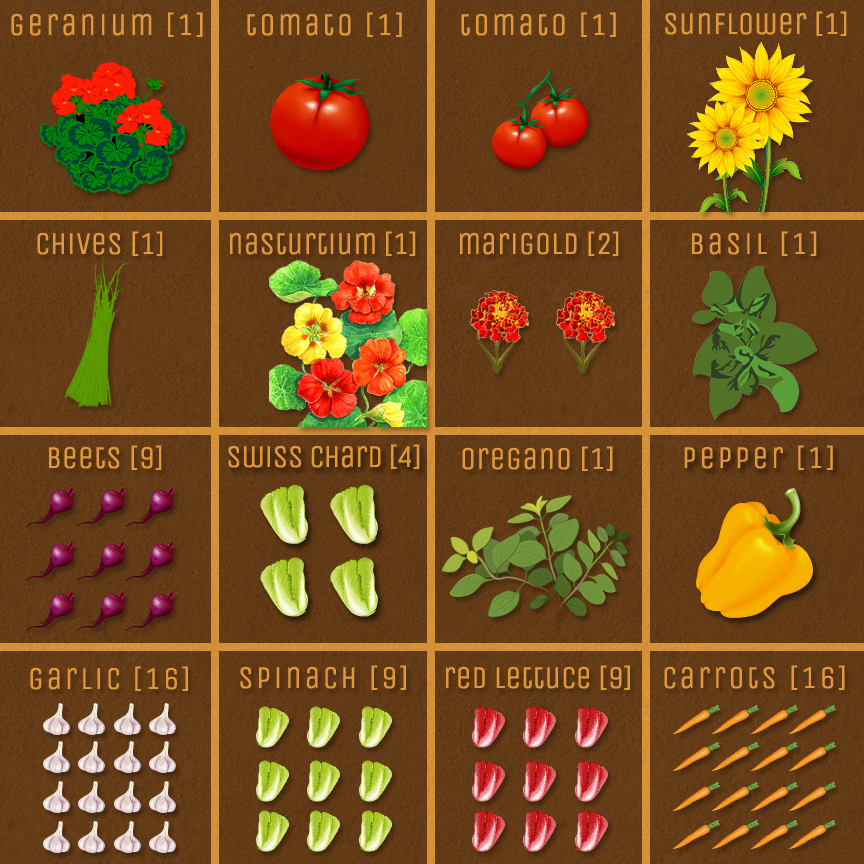
When your square foot garden is filled, its time to sow your seeds and plant your plants. Separate your garden into, you got it, square feet. A 4′x4′ bed will create 16 – 12″x12″ spaces, so you’ll be able to grow 16 different types of plants in one garden. Creating a “Grid” with wood makes it easier to tell your spaces apart. Plant different vegetables, herbs or flowers in each space. Large plants will take up one whole square foot space. Divide each square foot to accommodate smaller vegetables. Mels square foot spacing guidelines: Plants requiring 6″ spacing – plant 4 per square foot. Plants requiring 4″ spacing – plant 9 per square. Plants requiring 3″ spacing – plant 16 per square. What about thinning? Theres no longer a need to thin plants with this method. Drop a couple of seeds into each hole and let it grow. If you do get too many plants in one spot, Dont pull it out! It’s recommended that you snip the unwanted plant off at the stem with scissors.
Square Foot Gardening Location
The best place to put your square garden? Mel says, right outside your kitchen window where you can see it often, it will keep you interested! If youre planting more than one garden, space each box 3 feet apart from eachother, or far enough to work comfortably and at least get a push mower through.
How Much Can You Eat?
Mel says one 4×4 square foot garden will feed one adult, one salad, every day, all summer. SO plant one for every person in the house that wants to grow a beautiful garden, eat fresh food and do something good for their health.
Square Foot Gardening Layout – Companion Chart
Is all this confusing? Maybe. But with a little research, it can be extremely easy. Theres a lot of information out there about it. To make things easier, I designed this chart of square foot companion plants, based on my vegetable garden layout.
Right click to save this chart on your computer…
Square Foot Gardening Pictures
Mel and his gardens
I absolutely love square gardening concept because when the gardens grow, they fill in so nicely and are loaded with a variety of color and texture, sure to be beautiful whatever your combination.
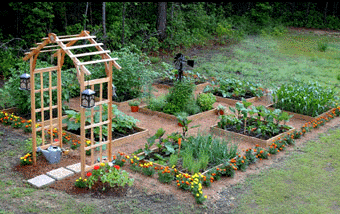
Gorgeous design by The Walden Effect
Look at this beautiful square foot combination. Absolutely gorgeous with the trellis arbor and flowers surrounding the boxes.
The Walden Effect took extra care in preparation to ensure weeds don’t grow outside the boxes. If this much prep aint your cup of tea, keep it in the box.
Mel and his team have been traveling around the world, teaching third world countries to grow their own food and providing the tools to do so. He has moved his company over to non-profit status, and all proceeds for items you buy through his company go toward his efforts to bring food to the world.
On a local note, right here in our own county, we have a similar effort. Garden Works DuPage is bringing vegetable gardens to low income families who show an interest in learning. Theyve upped their game from last year, supporting 4 families, to 14 in the coming 2013 season, providing funraising items such as tshirts and coloring books for the kids, and volunteer oppurtunities to those who are willing. Im ALL over that! What a loving effort. Please go to their facebook page and like them if you live outside the area or are unable to donate.
If you can see square foot gardening in your near future, and would like to know more about it, visit squarefootgardening.com or .org or you can still buy his books

Square Foot Gardening... Vegetables Just Got a Whole Lot Easier.


 Option #1
 Option #2
 Heres a new variety called ‘Fiesta’ Forsythia. Obviously, it doesnt need pruning yet, but if youre saying ‘oh wow’ Im right there with you. I cant wait to see how this guy grows.
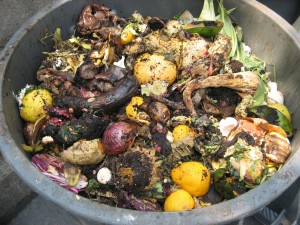
 And you can GROW great garden soil. Thousands of tiny organisms are eating away at your soil every day… and pooping it out! You know the best organic fertilizer is, you got it…POOP. Cow poop, chicken poop, worm poop. Its in all the stores. Mico organism poop is just as good and its already IN your soil… but you can grow your microbe count and improve your garden soil by ridiculous amounts.


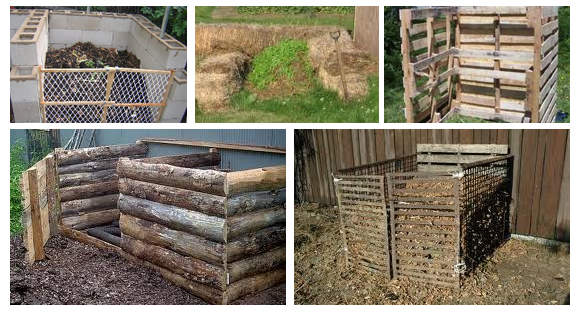
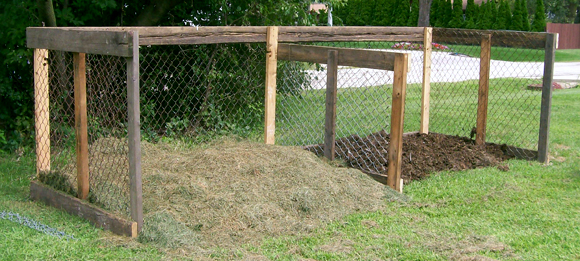
 If you dont need a ton of compost a small container can work, like this garbage can. Its easy to take care of, dump it out, mix it up then pile it back in. Unless you drill holes in the can, it wont drain or breathe well and can get downright stinky. Make sure to turn it often.
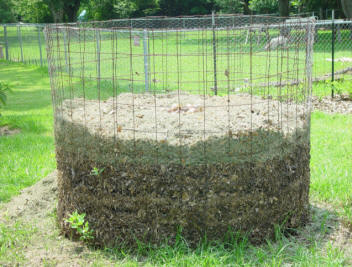 This one’s creative! A chicken wire hoop has great drainage and air flow. Being able to disassemble the hoop to turn the pile would be super helpful. Reassemble and scoop the compost back in.